This testimonial slider on Homepage #1 utilizes the Tabs block and incorporates additional tricks to make it look like an advanced testimonial slider. There are a few tricks to this trade I’ll walk you through, but I promise it’s worth it! 😉
Watch the Video
- Utilize the “TESTIMONIAL 1”, “TESTIMONIAL 2”, etc. labels at the top of the section to navigate the content editor. Note: these are NOT visible on the published site. This is intentional!
- Edit the content of each slider as you normally would: photos, text, etc.
- The arrow buttons for each tab also looks different in the editor vs. published site. Do not add text to the button to maintain only the arrows showing (this is intentional and recommended).
Adding a New Slide
Due to a limitation in the framework, we cannot simply duplicate an existing slide. We will need to copy the elements to a new tab instead. Here’s how to do that!
Step 1 – Copy Content of Existing Slide
- Since we’re adding a slide, we want to copy TESTIMONIAL 2 since it has both the backwards and forward button that will be relevant to this added slide.
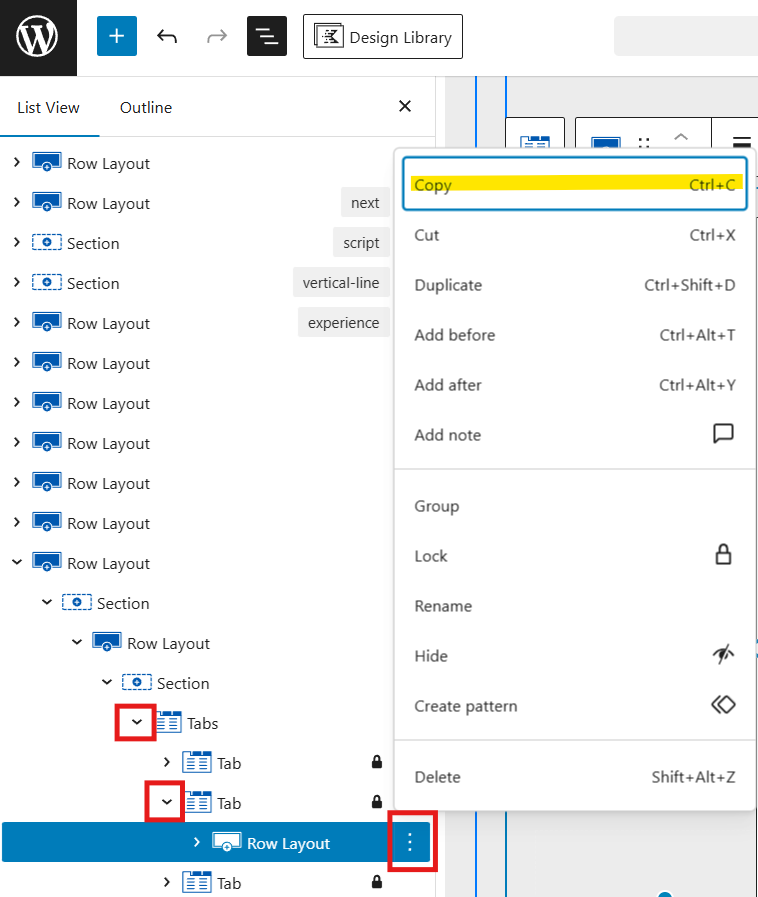
- We’ll utilize the List View to help us! This comes in so much handy here. Open the List View in the top left of the editor (three stacked horizontal lines).
- If needed, click within the content of TESTIMONIAL 2 to be brought to its location in the List View.
- Toggle open the Tabs block by clicking on the > to the left of it.
- Toggle open the second Tab by clicking on the > to the left of it.
- Select the Row Layout.
- Click the three vertical dots to the right of it, then cick Copy.
Step 2 – Add New Tab + Paste Content
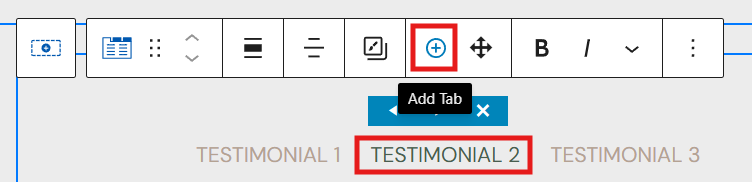
- Click back into the content of the page, and click on TESTIMONIAL 2 to open the top toolbar.
- Click the + icon to add a new tab (testimonial).
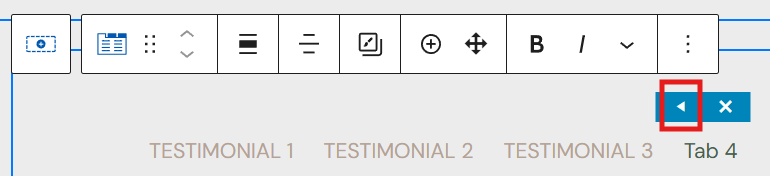
- Tab 4 has been added to the end. Click on it (if not already selected) and click the left arrow in the blue box to move it over, inbetween 2 & 3.
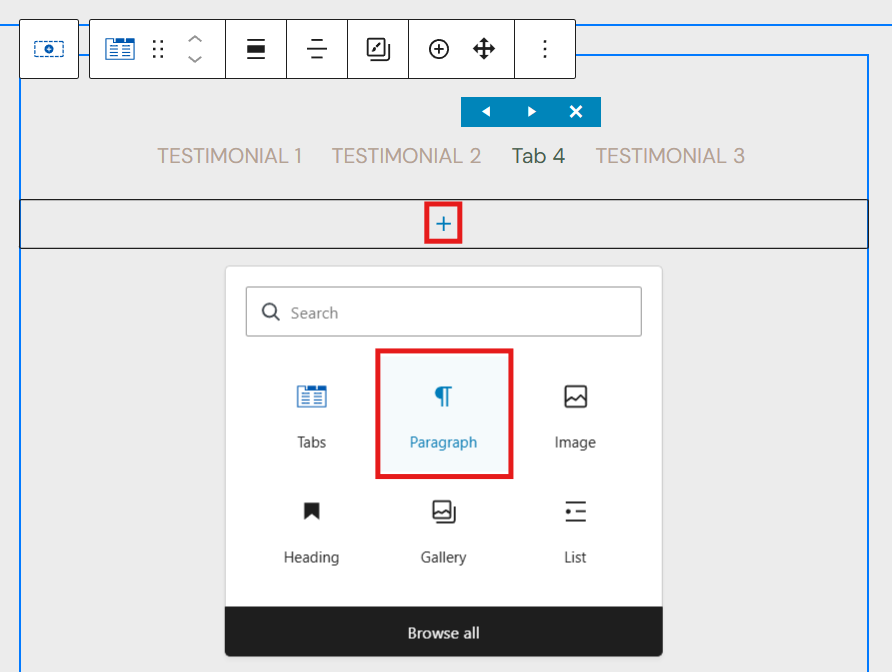
- Click the plus to add a block.
- Add Paragraph (search for it if needed).
- Paste the copied element by right clicking > Paste or Ctrl+V.
- Edit the pasted content as desired.
Step 3 – Update the Tab Links
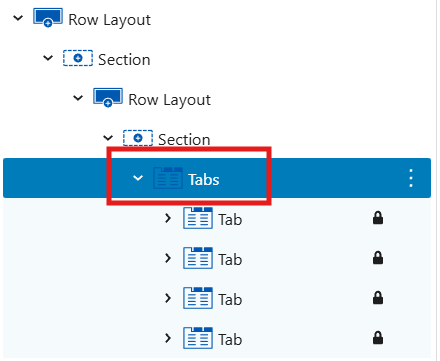
- Open the settings for the parent Tab group (the block called Tabs). Utilize List View for easy navigating.
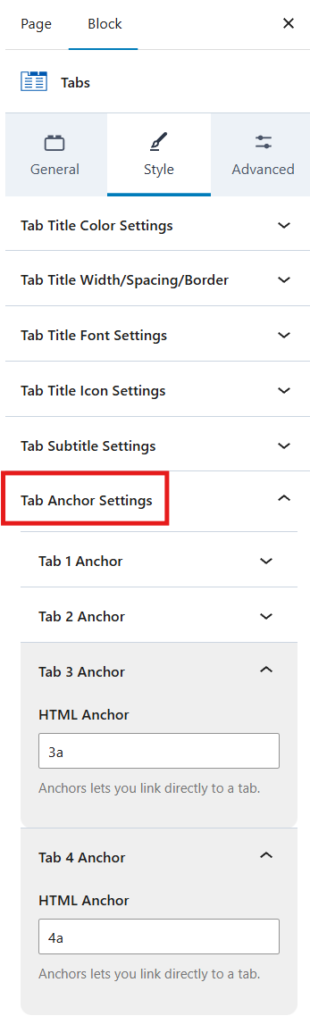
- Open the Style tab and scroll down & toggle Tab Anchor Settings.
- For this example, we need to update Tab 3 Anchor and Tab 4 Anchor. The naming convention provided is 1a, 2a, 3a, etc. I recommend keeping the similar for the newly-added tab.
- Toggle Tab 3 Anchor and type 3a.
- Toggle Tab 4 Anchor and change to 4a.
Steps continued below…
Step 4 – Fix Carousel Navigation Links
This is the most important part!
- We now need to change the links of the arrow buttons on the second, third, and fourth tab.
- To change the links, click on the arrow button > the (-) icon > and finally the pencil icon to edit the link.
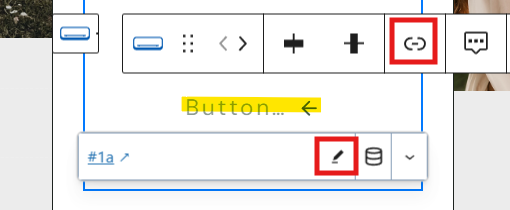
- Delete any existing text and be sure to include the hashtag # for any link changes you make. You’ll click the curved arrow to append changes when done.

- Second Tab:
- Change only the forward arrow to #3a.
- Third Tab:
- Change the back arrow to #2a.
- Change the forward arrow to #3a.
- Fourth Tab:
- Change the back arrow to #3a.
Step 5 – Save Changes & Preview!
Finally, Save the edits to your page and preview the edits on the live site to confirm everything is linked correctly.
Step 4 – Fix Carousel Navigation Links
This is the most important part!
- We now need to change the links of the arrow buttons on the second, third, and fourth tab.
- To change the links, click on the arrow button > the (-) icon > and finally the pencil icon to edit the link.
- Delete any existing text and be sure to include the hashtag # for any link changes you make. You’ll click the curved arrow to append changes when done.
- Second Tab:
- Change only the forward arrow to #3a.
- Third Tab:
- Change the back arrow to #2a.
- Change the forward arrow to #3a.
- Fourth Tab:
- Change the back arrow to #3a.
Step 5 – Save Changes & Preview!
Finally, Save the edits to your page and preview the edits on the live site to confirm everything is linked correctly.
Links not working right or jumping to a different part of the page? Please review Multiple Sliders on One Page for troubleshooting.
Last updated on February 13, 2026
Previous Article
next Article