The Florence theme supports both Kadence’s built-in fonts and custom fonts that you upload yourself.
If you imported the demo content, the site may initially appear with incorrect fonts. This is expected—those demo fonts must be uploaded and connected locally before they display properly.
Follow the steps below to upload and activate the theme fonts.
Watch the Video
Step 1 – Confirm the Custom Fonts Plugin is Activated
Before uploading fonts, make sure the required plugin is active.
- In your WordPress dashboard, go to Plugins → Installed Plugins.
- Confirm the plugin Custom Fonts – Host Your Fonts Locally is installed and activated. If not, search for and activate the plugin.
This plugin is included with the demo import, but it’s always good to double-check.
Step 2 – Open the Custom Fonts Library
- In the WordPress dashboard, go to Appearance → Custom Fonts.
- You should see two placeholder fonts already listed.
These fonts were included with the theme demo content and just need to be connected to the correct font files.

Step 3 – Connect the First Demo Font
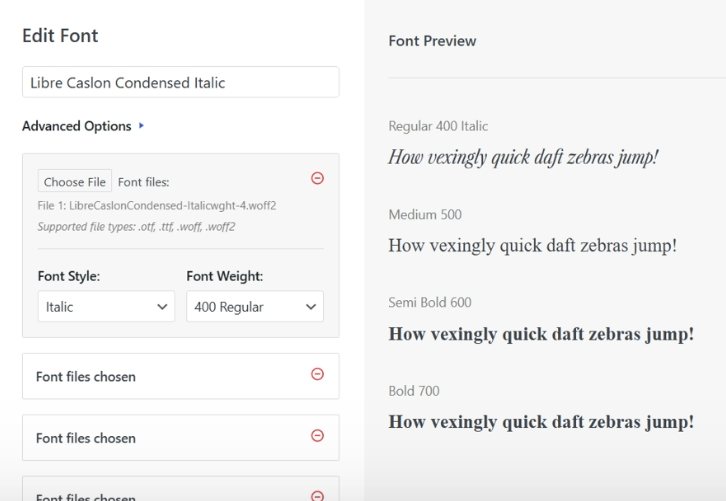
- Click Edit on the first font in the list.
- On the left side, you’ll see several “Font Files Chosen” fields.
- Click Choose File on the first field.
- Select Media Library.
- Locate the file labeled Italic Weight (this is the correct file for this font).
- Click Select.
Repeat this process for all font file fields.
As you upload them, you’ll see the font preview update on the right side.
- Once all files are selected, click Save Font.
Step 4 – Connect the Second Demo Font
Now repeat the process for the second font.
- Click Edit on the second font.
- Click Choose File for each of the font file fields.
- This time select the font labeled Condensed Weight (without “italic” in the name).
- Repeat for all four file fields.
- Once finished, click Save Font.
You should now see both fonts updated in the Custom Fonts list.
Step 5 – Add the Accent Script Font
The Florence theme also uses an accent script font.
- Click Add New Font.
- Name the font Curly Script (or whatever script font you prefer).
- Click Choose File.
- Upload the script font file.
- Click Use Font. Since this script font is only using one weight (thickness), you don’t need to worry about additional font styles.
- Click Save Font.
Step 6 – Confirm the Fonts Are Applied
Return to the live view of your website. If you uploaded the recommended fonts, you should see the site automatically update with the correct typography. This happens because the Florence theme is already configured to use those fonts once they are available.
If you chose to use a different accent/script font, we’ll need to take a few extra (but quick!) steps to get that to show. See the article Using & Applying Custom Fonts in Florence Theme for that!
Articles Mentioned
Last updated on March 10, 2026
Previous Article
next Article