This guide focuses on theme-specific edits that are unique to this page’s layout and functionality. Simple updates—like changing text, fonts, or images—are not covered, as those are already included in Kadence and WordPress tutorials.
Part 1 – Sections: Welcome — Carousel Gallery
Watch the Video
Adjust the Vertical Line Separator
If you see a long horizontal box/line going through the editor, that’s the divider element between the welcome & services sections.
Change Divider Length
- Click on the divider to open the settings panel.
- Locate the Divider Width setting to increase or shorten the vertical length of the separator.
Recommended Settings
- Keep the Height (in Spacer Settings) around 20px. Increasing this number adjusts the spacing between the two sections.
- Divider Height is the thickness of the line. By default this is 1.
Editing Around the Divider
The element should not be very obstructive to your editing flow, but if for any reason it is, open the Document Overview (Shift+Alt+O) to open the list view of all blocks on the page. This allows you to view the exact order and structure of every block on the page, which is especially helpful if you have a page with a lot of content.

Open the Document Overview

- To access the Document Overview or List View, click the icon that looks like three horizontal lines above each other at the top left corner of the editor.
- Select a block in the list. The divider can be found in the Section block titled vertical-line.
- Toggle open the vertical-line Section block by clicking on the arrow to the left of the Section.
- Select the Spacer / Divider block to open the settings.
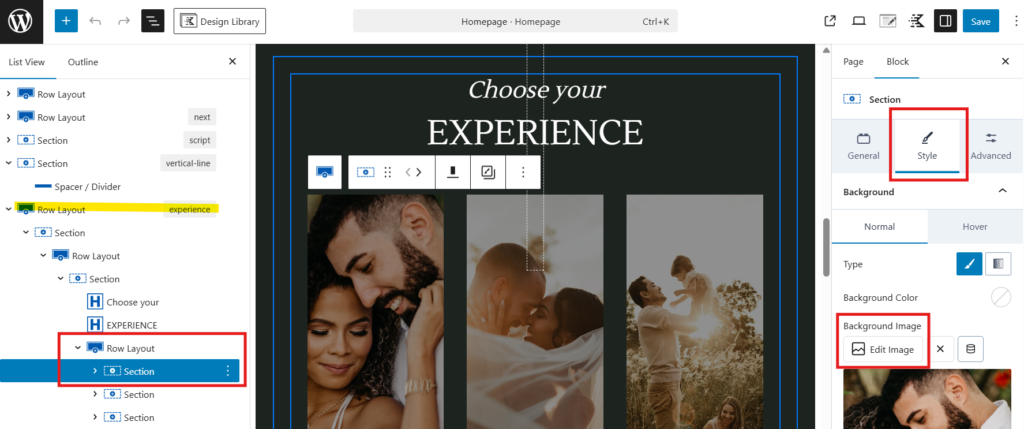
Experience Section
Image Boxes
Change the Photos
The images are background images to the Section blocks of the page.
- Click on the image you want to change to open the section settings.
- Navigate to the Style section of the settings sidebar.
- Toggle the Background settings and click Edit Image of the Background Image setting.
Link the Entire Photo Box – Optional
You can make the whole section clickable beyond the button links:
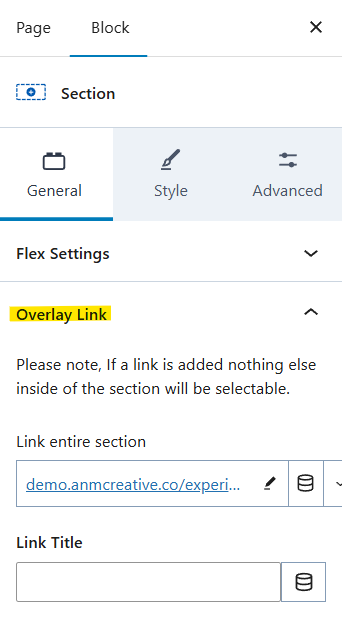
- Select the section.
- Go to the General tab and scroll down to Overlay Link.
- Add your link there.
Featured Collections
How these Work: These are manual links and not dynamic. Meaning, these will not update automatically with new blog posts or pages. These are intented to spotlight your favorite work and be updated manually.
- The collections on the left & right use the basic blocks like Image and Text, with hyperlinks to your desired page.
- The middle collection is a background image of the section and works similarly to the image boxes of the Experiences section (explained above).
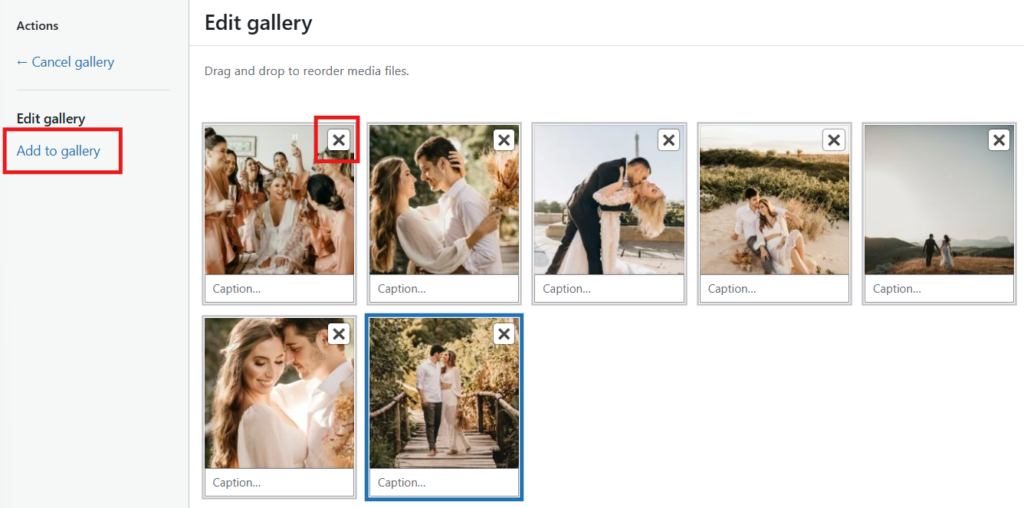
Carousel Gallery
- Click on any image in the gallery to open the settings.
- Click the stacked photo icon that appears in the tooltip that appears just above the block to Edit/Add gallery images.
- Remove any of the placeholder photos by clicking the X in the top right corner of the icons.
- Add new images by clicking on Add to gallery located on the left.

Part 2 – Sections: Testimonials — Call to Action
Watch the Video
Testimonials
Please refer to the Multiple Sliders on the Same Page article.
Blog
Important things to note for this section:
- Ensure that each post has a featured image for optimal appearance.
- To limit posts by category, modify the settings accordingly. (You will need to do this for each of the three blocks).
- Avoid changing the layout unless necessary.
- Edit the style as needed, but ensure consistency across sections.
- Update the “Read more on the Journal” link to point to your own site.
Call to Action
Edit the background image & overlay, as done similary with the Header section of this page.
Articles Mentioned
Last updated on February 14, 2026
Previous Article
next Article