It’s easy to replace the custom/script font in just a few clicks. Any time you want to change your custom font to a different one, just follow these steps again!
If your theme came with a custom font, it will be included in your download (unless otherwise stated) and will need to be added separately into your theme. You may notice a font looks off/not like the demo theme – this is usually due to needing to complete this custom font process.
Why didn’t the font already display in the theme when it was installed? Due to limitations within WordPress and/or Kadence (free version), we are unable to use fonts beyond the given selections (usually only pulling from Google fonts). This limits us to very generic fonts. With the help of a simple free plugin and just a few minutes, we’re able to add any beautiful (and free!) font.
Step 1 – Set up the Use Any Font Plugin
- If not already done so, install the Use Any Font plugin (it’s free!). This would have been installed with your theme, but if not, go ahead and install it now.
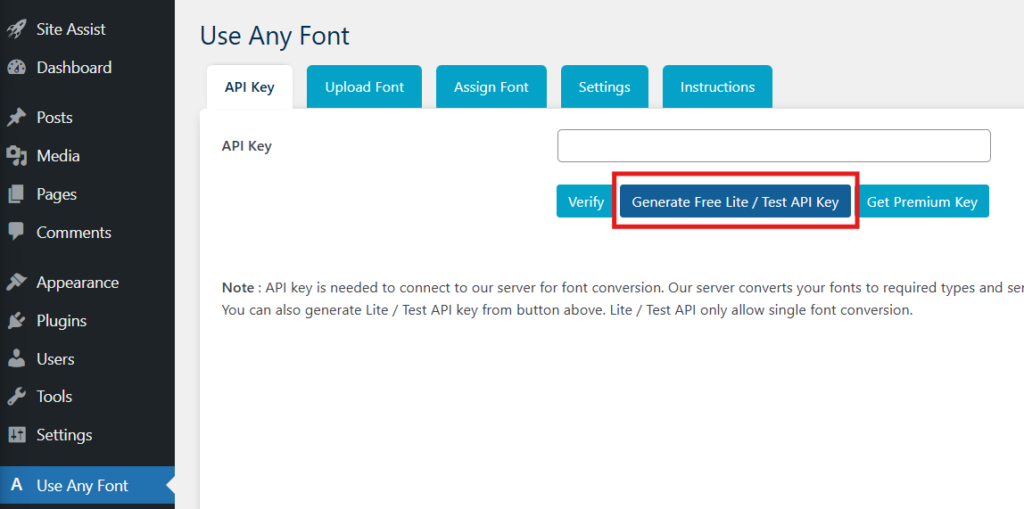
- Open the Use Any Font plugin and click Generate Free Light / Test API Key.
- Then click Verify. This allows you to upload one font in this plugin for free.
Step 2 – Upload the Font
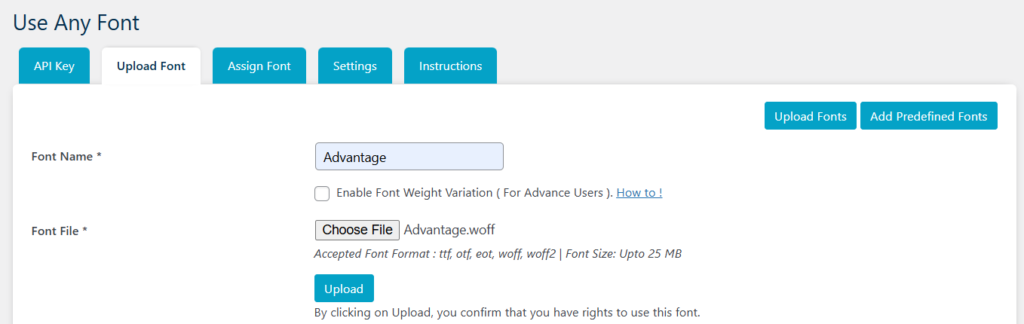
- Now go to the Upload Font tab.
- Input the font name, upload the file, then click Upload.
Step 3 – Assign the Font
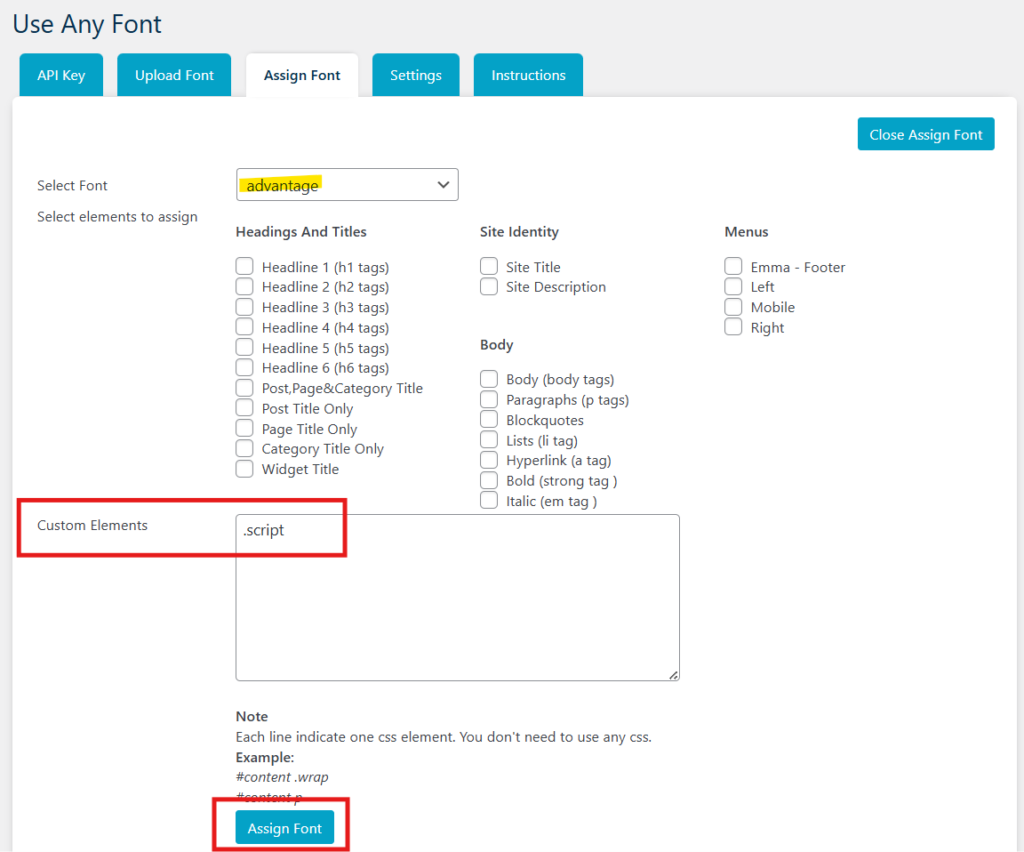
- Now go to the Assign Font tab.
- Click Assign Font.
- Select the font you just uploaded from the dropdown.
- In the Custom Elements box, type
.script
Note: Please confirm in your theme-specific documents that this is the correct Custom Element to assign for your custom font. - Click Assign Font.
Adding or Removing the Custom Font from a Text Block
By default, the template has assigned specific Text Blocks with this custom font so each time you reassign the .script class, they will update with whatever font you assigned in Step 3. This makes it easier for you to make changes in one sweep, instead of each block one at a time.
However, if you ever want to assign new blocks to the font, or remove, here’s how to do that!
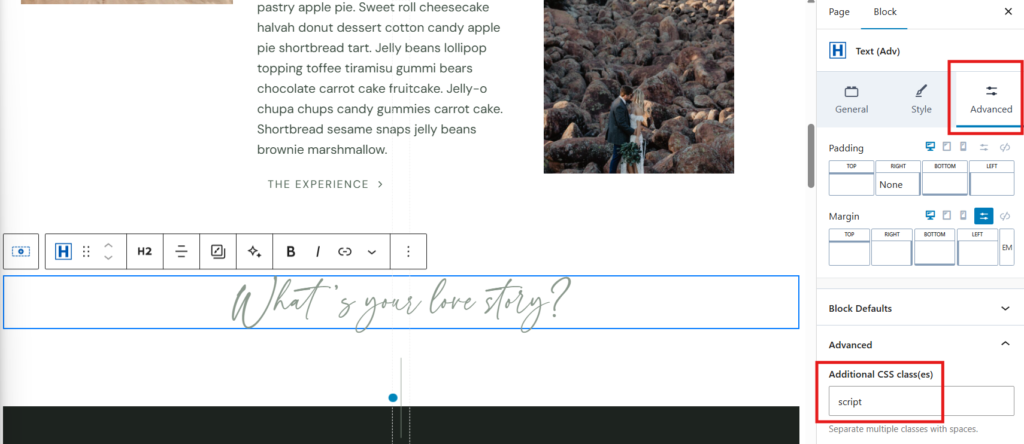
- In the Page Editor, locate the text block with the custom font and click on it to open the settings.
- Navigate to the Advanced tab.
- Toggle the Advanced group of settings.
- Locate the Additional CSS class(es) setting.
- In the text box:
- To remove: simply delete the text input.
- To add: add the name of the Custom Element you assigned from Step 3 without the period (.).
Example: Custom Element.scriptwe would type in herescript
- Click Save!
Troubleshooting: Custom Font Still Shows Once Removed
In some cases, if you are still seeing the custom font that you removed (such as the one that came with the theme), you may need to check & edit an additional setting.
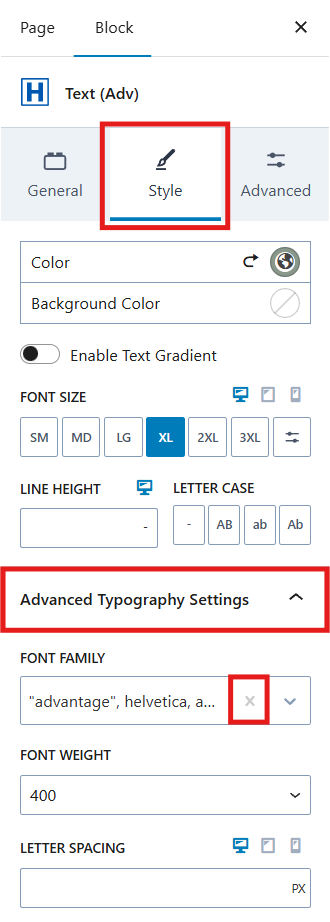
- In the Style tab of the Text Block, toggle the Advanced Typography Settings group.
- In the Font Family dropdown, click the X icon to remove.
While the Use Any Font plugin integrates with Kadence Blocks (which is why your uploaded font appears in this dropdown), I recommend assigning text blocks to your Custom Element (Step 3) instead. This makes future edits easier and allows you to update everything at once, since this dropdown won’t automatically apply the new font to existing text blocks.
Troubleshooting: Custom Font Doesn’t Appear in Page Editor, but it does on Live Site
This is okay! The WordPress backend (page editor, admin dashboard, etc.) doesn’t pick up on the custom CSS (Custom Element from Step 3) we’ve set up as it only translates to the live site.
However, if it does bother you, you can apply the custom font manually in the dropdown to have it appear in the Page Editor. Just be sure to keep it assigned to .script (or whatever Custom Element you named) so that these fonts can always automatically change any time you want to replace the Custom Font.
Last updated on February 14, 2026
Previous Article
next Article